What is Packaging Experiment
Corrily’s packaging experiments allow you to test various packaging strategies for your entire user base or a subset of users to find out, what combination of products and plans work best for them. You can use a packaging experiment to test:- Different combination of plans for e.g. say you have 4 tiers of your product offering -
Basic, Pro, Team, Advanced. A packaging experiment allows you to test showing different combination of those plans to different users (including targeted segments), and decide what’s the optimal combination - A packaging experiment also allows you to test different copies, feature highlights etc. by creating different variants of the same plans say
Basic VariantAv/sBasic VariantB
How to setup Packaging Experiment
1. Select Experiment Products
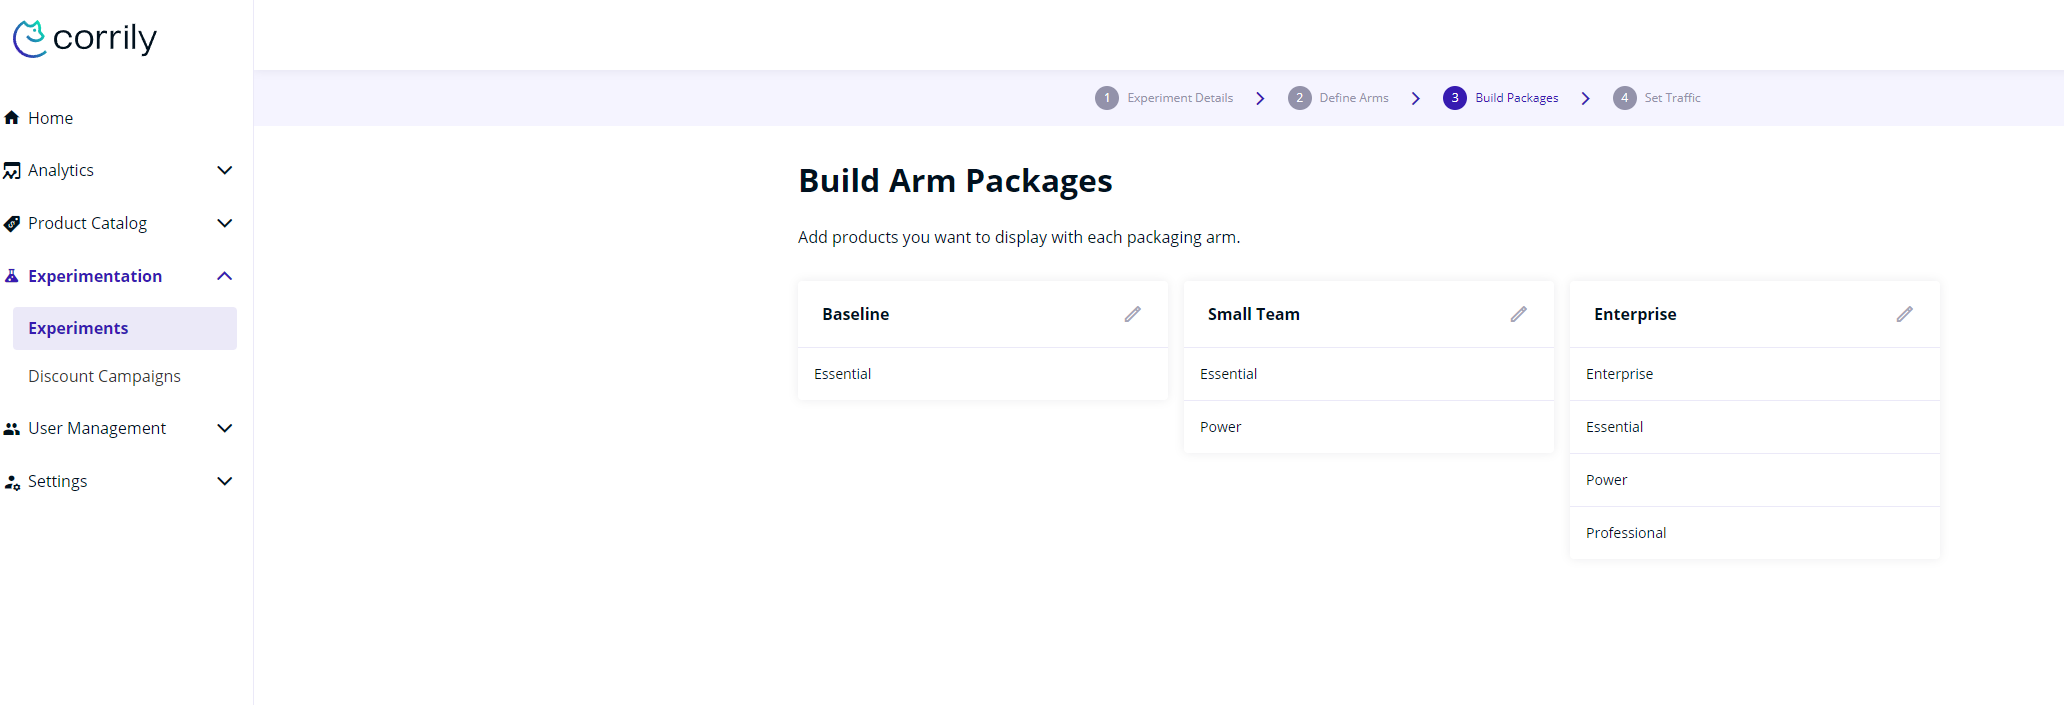
Upon naming your experiment, the subsequent step is to determine the products that will be part of the experiment. This could encompass various subscriptions or packages, ranging from monthly to annual durations or from basic to advanced offerings. These product definitions are located in the ‘Products’ tab of our dashboard. For a comprehensive guide on product creation and management, refer to Products documentation page.2. Add Arms and select Packages for Axperimental Arms
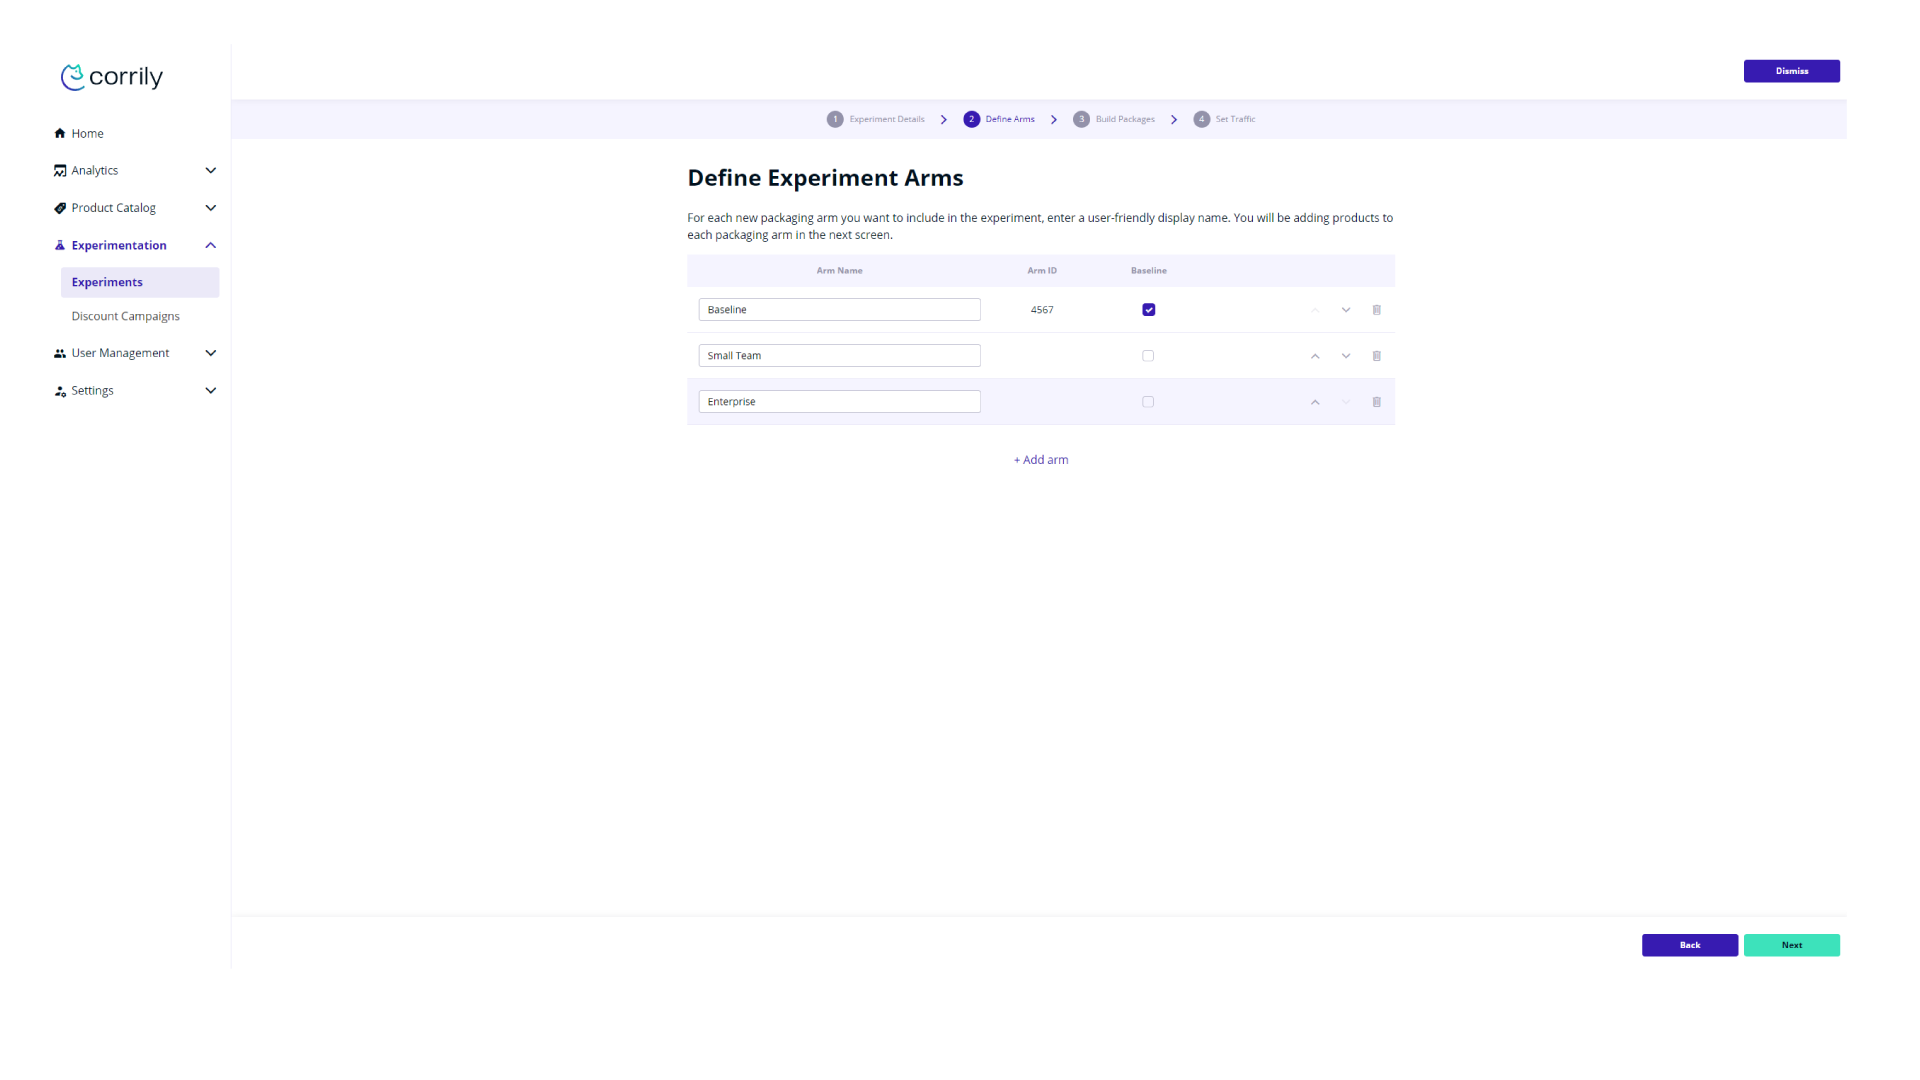
Corrily experiments utilize the concept of arms. Think about it as about “AB tests on steroids”. Experiment will have a couple of arms to test, which should include the single baseline arm to compare with. For any arm except baseline you would need to set the products you want in that specific package. could be done in the Experiment Setup Interface, similar to Price Control Center. In our example, we are starting a new experiment, and after filling the first page of information related to the experiment we reach the Define Arms step. Here we have a Baseline arm and we need to add at least one more to be able to proceed. Note that if you wish to delete the Baseline arm you can do that but you need to set another added arm as the new Baseline.